@RestController and @Controller in Spring Framework
The primary difference between @RestController and @Controller in the Spring Framework lies in how they handle HTTP
@Controller :
@Controller :
- @Controller is used to define a controller class that can handle HTTP requests and return views.
- Typically used in web applications where the responses are HTML pages.
- You need to use @ResponseBody on methods to indicate that the return value should be written directly to the HTTP response body.
@RestController:
- @RestController is a specialized version of @Controller that combines @Controller and @ResponseBody.
- Designed for RESTful web services where the responses are typically JSON or XML.
- All methods in a class annotated with @RestController implicitly have @ResponseBody applied, so the return values are written directly to the HTTP response body.
Summary
Use @Controller when you need to return views (HTML pages).
Use @Controller when you need to return views (HTML pages).
Use @RestController when you need to create RESTful services and return data (like JSON or XML) directly in the response body.
OAuth2 Security with Spring Boot
Introduction
OAuth2 is a token-based security authentication and authorization framework that breaks security down into four components. These four components are
OAuth2 is a token-based security authentication and authorization framework that breaks security down into four components. These four components are
- A protected resource—This is the resource (in our case, a microservice) you want to protect and ensure that only authenticated users who have the proper authorization can access
- A resource owner—A resource owner defines what applications can call their service, which users are allowed to access the service, and what they can do with the service. Each application registered by the resource owner will be given an application name that identifies the application along with an application secret key. The combination of the application name and the secret key are part of the credentials that are passed when authenticating an OAuth2 token.
- An application—This is the application that’s going to call the service on a behalf of a user. After all, users rarely invoke a service directly. Instead, they rely on an application to do the work for them.
- OAuth2 authentication server—The OAuth2 authentication server is the intermediary between the application and the services being consumed. The OAuth2 server allows the user to authenticate themselves without having to pass their user credentials down to every service the application is going to call on behalf of the user.

OAuth2 is a token-based security framework. A user authenticates against the OAuth2 server by providing their credentials along with the application that they’re using to access the resource. If the
user’s credentials are valid, the OAuth2 server provides a token that can be presented every time a service being used by the user’s application tries to access a protected resource (the microservice).
The OAuth2 specification has four types of grants:
- Password
- Client credential
- Authorization code
- Implicit
To set up an OAuth2 authentication server, you need the following Spring Cloud dependencies in the authentication-service/pom.xml file
For Example: You have to Create Project Node Name is: "a143mk-Oauth2-Security" on STS4 Tools.

Pom.xml file.
Create AuthServer.java class for use Authorization Server Configuration.
The first thing to note in this listing is the @EnableAuthorizationServer annotation. This annotation tells Spring Cloud that this service will be used as an OAuth2 service and to add several REST-based endpoints that will be used in the OAuth2 authentication and authorization processes.
Like other pieces of the Spring Security framework, to set up users (and their roles), start by extending the WebSecurityConfigurerAdapter class and mark it with the @Configuration annotation.
As such, you need to provide the OAuth2 server a mechanism to authenticate users and return the user information about the authenticating user. This is done by defining two beans in your Spring WebSecurityConfigurerAdapter implementation: authenticationManagerBean() and userDetailsServiceBean(). These two beans are exposed by using the default authentication authenticationManagerBean() and userDetailsServiceBean() methods from the parent WebSecurityConfigurerAdapter class.
you have to Create ConfigWeb.java class.
Run As-> Spring Boot App for Output:

For step by step development working watch the video and learn yourself.
A Rest API with Spring Boot using JSON, MySQL and JPA
Introduction:
In this article will look into how to create a REST API using HTTP methods for Create and Retrieve operations in Spring Boot along with MYSQL database. Spring Boot is an open source Java-based framework to build enterprise spring applications. .
In this article will look into how to create a REST API using HTTP methods for Create and Retrieve operations in Spring Boot along with MYSQL database. Spring Boot is an open source Java-based framework to build enterprise spring applications. .
Overview:
- Create MYSQL database From WampServer.
- Create the Spring Boot Project From STS-4.
- Create Entity model class.
- Create JPA Data Repository.
- Create Service class.
- Create Rest Controllers class.
- Run the Project.
- Testing using Postman.
- Video Link for watching How to build API.
Create MYSQL database using WampServer.
Download WampServer install and Run-> go to phpMyAdmin and click.
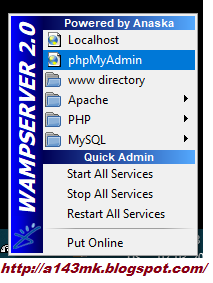
Create Database Name is “hostel”.

Crate Table in hostel Database.
Table Name is states with number of fields/Column.

Create Table column name, which is show in image.

Create the Spring Boot Project from STS-4:
It will write project name, group, artifact, version, description, package etc.

Create Entity model class.
- Create the States model class to map with the States table.
- @Entity is used to annotate that the class is an entity in the database.
- @Table is used to annotate name of table in the database.
- @id is used to reference that widget to your java file and access it from java file.
- @GeneratedValue is used to generation strategies for the values of primary keys.
States.java
Create JPA Data Repository.
- Create StatsRepository Repository interface extending JPA Repository.
- There are not need writing any SQL/MySql etc query.
- @Repository annotation is used to indicate that the class provides the mechanism for storage, retrieval, search, and update and delete operation on objects.
StatsRepository.java
Create Service class.
- Create StateService service class to code the business logic and it acts as a middle layer between repository and controller class.
- @Service annotation is a specialization of @Component annotation. Spring Service annotation can be applied only to classes. It is used to mark the class as a service provider.
- @Transactional StateService annotate methods are executed in transactions.
Example:
@Transactional(readOnly = false, rollbackFor={Throwable.class, Exception.class}, propagation = Propagation.SUPPORTS) - @Autowired annotation is used for automatic dependency injection. Spring framework is built on dependency injection and we inject the class dependencies through spring bean configuration file.
StateService.java
Create Rest Controllers class.
- Create Rest StateController Controller class which contains all REST API endpoints for Create and Retrieve operations.
- @RestController annotation was introduced in Spring 4.0 to simplify the creation of REST web services. It's a convenience annotation that combines @Controller and @ResponseBody– which eliminates the need to annotate every request handling method of the controller class with the @ResponseBody annotation.
StateService.java
Run the Project:
Write click to project and Run as->Spring boot App, it will check console to run project success and check running port.

Testing using Postman.
Execute GET Request method to add a States to the Database.

Video Link for watching How to build API.
Model–View–Controller (MVC) Design Patterns
It is defined as follows
Step 2. Create View.
CollageView.java
Step 3. Create Controller.
CollageController.java
Step 4. Use the CollageController methods to demonstrate MVC design pattern usage.
MVCPatternDemo.java
- Models: Models are object used as blueprints for all of the objects that will be used in the application.
- Views: views are used to represent the presentational aspect of the information and data located in the models.
- Controller: controller are act as both of the models as well as views. They serve as a connection between the models and views.
Example: we are going to use MVC design Pattern to set and print the data of the collage Collages.
Step 1. Create Model.
Collage.java
Step 1. Create Model.
Collage.java
Step 2. Create View.
CollageView.java
Step 3. Create Controller.
CollageController.java
Step 4. Use the CollageController methods to demonstrate MVC design pattern usage.
MVCPatternDemo.java
Step 5: Verify the output.
Collage:
Name: ABCD
Roll No: 20
Collage:
Name: Manoj
Roll No: 20
Spring MVC and Hibernate Tutorial
Spring is a lightweight framework. it provides support to various frameworks such as Hibernate, Struts, Tapestry, EJB, JSF, etc.
Modules: IOC(Inversion of control), AOP(Aspect Oriented Programming), DAO(Data Access Object), Context,ORM(Object-relational Mapping), Web, MVC(Model View Controller). etc.
This is a step-by-step tutorial that helps you build a Spring-Hibernate application easily in a clear and concise way. In this first part, we demonstrate how to code a simple Spring MVC application that displays a list of users from MySQL database.
1. Create Database Name is demo and Database Table name is springhibernet.
Open NetBeans See The Menu Bar go to the file Menu Click on the New Project(Ctrl+Shift+N) and Select Left site categories Java/java web and Project categories to Right Site Project java/web Application .You have to give The Program Name "SpringHibernateTutorial". if you wont to save Project Location you can Browse and File save on the direction place and Gone a default Place and Now uncheck/check the check box and click on the next button, select server settings and select The Spring Web MVC Framework 4.0 and Hibernate Framework 4.3 and go to the finish.

This is automatic generated page code with custom according to performance.
2.applicationContext.xml
3.dispatcher-servlet.xml
4.web.xml
5.redirect.jsp
There are default package with custom and controlling package classes.
6.default package
A. hibernate.cfg.xml
B. hibernate.reveng.xml
7. controlling package
B. Springhibernet.hbm.xml
c. HibernateUtil.java
2. This is the view controlling package name is "com.spring.module".
A. view.java
Web browser page index.jsp and view.jsp.
8.index.jsp

9. view.jsp

Modules: IOC(Inversion of control), AOP(Aspect Oriented Programming), DAO(Data Access Object), Context,ORM(Object-relational Mapping), Web, MVC(Model View Controller). etc.
This is a step-by-step tutorial that helps you build a Spring-Hibernate application easily in a clear and concise way. In this first part, we demonstrate how to code a simple Spring MVC application that displays a list of users from MySQL database.
1. Create Database Name is demo and Database Table name is springhibernet.
Open NetBeans See The Menu Bar go to the file Menu Click on the New Project(Ctrl+Shift+N) and Select Left site categories Java/java web and Project categories to Right Site Project java/web Application .You have to give The Program Name "SpringHibernateTutorial". if you wont to save Project Location you can Browse and File save on the direction place and Gone a default Place and Now uncheck/check the check box and click on the next button, select server settings and select The Spring Web MVC Framework 4.0 and Hibernate Framework 4.3 and go to the finish.

This is automatic generated page code with custom according to performance.
2.applicationContext.xml
3.dispatcher-servlet.xml
4.web.xml
5.redirect.jsp
There are default package with custom and controlling package classes.
6.default package
A. hibernate.cfg.xml
B. hibernate.reveng.xml
7. controlling package
- This is the Bean class and hbm file package name is "com.pojo.file".
B. Springhibernet.hbm.xml
c. HibernateUtil.java
2. This is the view controlling package name is "com.spring.module".
A. view.java
Web browser page index.jsp and view.jsp.
8.index.jsp

9. view.jsp

Subscribe to:
Posts
(
Atom
)